Eclipse搭建SpringBoot(二)控制器Controller

1.新建项目

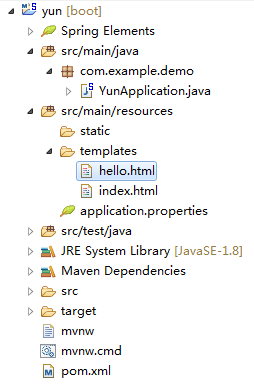
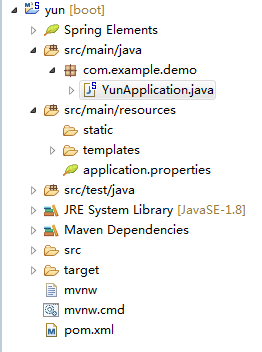
首先,我们重新创建一个名为 yun 的 SpringBoot 项目,创建完成后项目结构如图所示:
2.修改 YunApplication.java

我们将 YunApplication.java 中的内容按照如下代码修改:

1
2
3
4
5
6
7
8
9
10
11
12
13
14
15
16
17
18
19
20
21
22
23
24
25
26
27
28
29
30
31
32
33
34
35
36
37
38
39
40
41
42
43
44
45
46
47
48
49
50
51
52
53
54
55
56
57
58
59
60
61
62
63
64
package com.example.demo;
import org.springframework.boot.SpringApplication;
import org.springframework.boot.autoconfigure.SpringBootApplication;
import org.springframework.stereotype.Controller;
import org.springframework.ui.Model;
import org.springframework.web.bind.annotation.PathVariable;
import org.springframework.web.bind.annotation.RequestMapping;
import org.springframework.web.bind.annotation.RequestParam;
import org.springframework.web.bind.annotation.ResponseBody;
/*
* 控制器使用示例
*/
@SpringBootApplication
@Controller
public class YunApplication {
public static void main(String[] args) {
SpringApplication.run(YunApplication.class, args);
}
/*
* 返回字符串
* 调用示例 : localhost:8080
*/
@ResponseBody
@RequestMapping("/")
public String greeting() {
return "Hello World!";
}
/*
* 不带参数的模版渲染
* 调用示例 : localhost:8080/index
*/
@RequestMapping("/index")
public String index() {
return "index";
}
/*
* 带参数的模版渲染(/风格)
* 调用示例 : localhost:8080/hello/1/jackie
*/
@RequestMapping("/hello/{id}/{name}")
public String hello(@PathVariable("id") String id, @PathVariable("name") String name,Model model) {
model.addAttribute("id", id);
model.addAttribute("name", name);
return "hello";
}
/*
* 带参数的模版渲染(?风格)
* 调用示例 : localhost:8080/hello?id=1$name=jackie
*/
@RequestMapping(value = "/hello")
public String hello2(@RequestParam String id, @RequestParam String name, Model model) {
model.addAttribute("ihttp://localhost:8080/hello?id=1&name=jackied", id);
model.addAttribute("name", name);
return "hello";
}
}

下面进行一些解释:

我们在响应请求时,主要分为两种情况:
  1. 我们想要返回一个字符串(可能是一个 json 串)。
  2. 我们想要返回一个页面。

对于前一种情况,我们可以使用 @ResponseBody 注解使返回的内容为我们想要返回的字符串。对于后一种情况,我们其实返回的是两样东西:

  1. 一个前端页面(我们称之为 templates)。
  2. 该页面所需要的数据(我们称之为 model)。

一个被返回的页面同时包括这两种东西,其中 model 可以直接用如下语句赋值:

1
model.addAttribute("id", id);

model 的每一个属性既可以是一个基本类型,也可以是字符串,列表(List)等。

templates 位于 src/main/resources/templates 下,后面我们会详细介绍。

下面介绍前面使用过的几种注解。

@Controller 注解的类会被当作一个控制器 Controller,专门用来处理不同请求不同的URL,从而有针对性的返回内容。

@RequestMapping 注解是用来处理请求地址映射的注解,可以用在类或方法上,如果用在类上,则表示所有该类中的响应方法都是以该地址作为父路径。如:

1
2
3
4
5
6
7
8
9
10
11
12
13
14
15
16
@RestController
@RequestMapping("/root")
public class YunApplication {
// 调用示例 : http://localhost:8080/root
@RequestMapping("/")
public String hello() {
return " Hello World1!";
}
// 调用示例 : http://localhost:8080/root/hello2
@RequestMapping("/hello2")
public String hello2() {
return "Hello World2!";
}
}

@ResponseBody 注解的类或方法在响应请求时只返回字符串,因此不能返回被渲染的模板。如我们上面提到的:

1
2
3
4
5
@ResponseBody
@RequestMapping("/")
public String greeting() {
return "Hello World!";
}

@RestController 注解整合了 @Controller@ResponseBody。在该类中所有的请求都只会返回字符串。如:

1
2
3
4
5
6
7
8
9
10
11
12
13
14
15
16
import org.springframework.boot.SpringApplication;
import org.springframework.boot.autoconfigure.SpringBootApplication;
import org.springframework.web.bind.annotation.RequestMapping;
import org.springframework.web.bind.annotation.RestController;
@SpringBootApplication
@RestController
public class YunApplication {
@RequestMapping("/")
public String greeting() {
return "Hello World!";
}
public static void main(String[] args) {
SpringApplication.run(App.class, args);
}
}

3.修改 pom.xml 文件

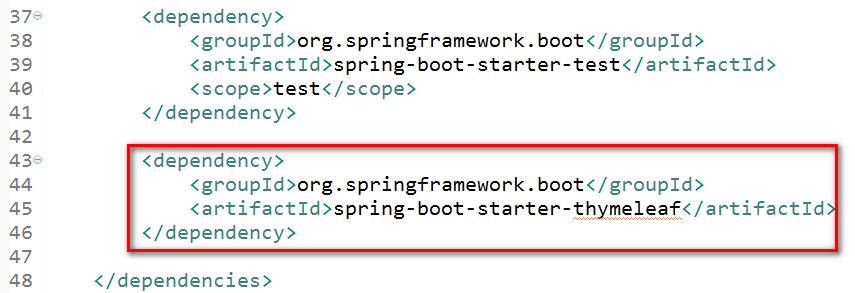
为了使我们的应用能够自动地去对应的位置去寻找 templates,我们需要使用thymeleaf模板引擎进行渲染。我们唯一需要做的事就是在 dependencies 标签中添加如下代码:

1
2
3
4
<dependency>
<groupId>org.springframework.boot</groupId>
<artifactId>spring-boot-starter-thymeleaf</artifactId>
</dependency>

添加完成的结果应该是这个样子的:

4.创建模板文件

src/main/resources/templates 文件夹下创建模板文件 index.html,内容如下:

1
2
3
4
5
6
7
8
9
10
<!DOCTYPE HTML>
<html xmlns:th="http://www.thymeleaf.org">
<head>
<title>Hello SomeOne</title>
<meta http-equiv="Content-Type" content="text/html; charset=UTF-8" />
</head>
<body>
<p> hello index! </p>
</body>
</html>

再在该文件夹下创建 hello.html,内容如下:

1
2
3
4
5
6
7
8
9
10
<!DOCTYPE HTML>
<html xmlns:th="http://www.thymeleaf.org">
<head>
<title>Hello SomeOne</title>
<meta http-equiv="Content-Type" content="text/html; charset=UTF-8" />
</head>
<body>
<p th:text="'Hello ' + ${name} + ', your id is ' + ${id} + '!'" />
</body>
</html>

从上面的代码中,我们是可以看到模板文件是如何调用 model 中的属性的。

1
${属性名}

5.测试结果

5.1.启动项目

完整的项目结构如下图所示:

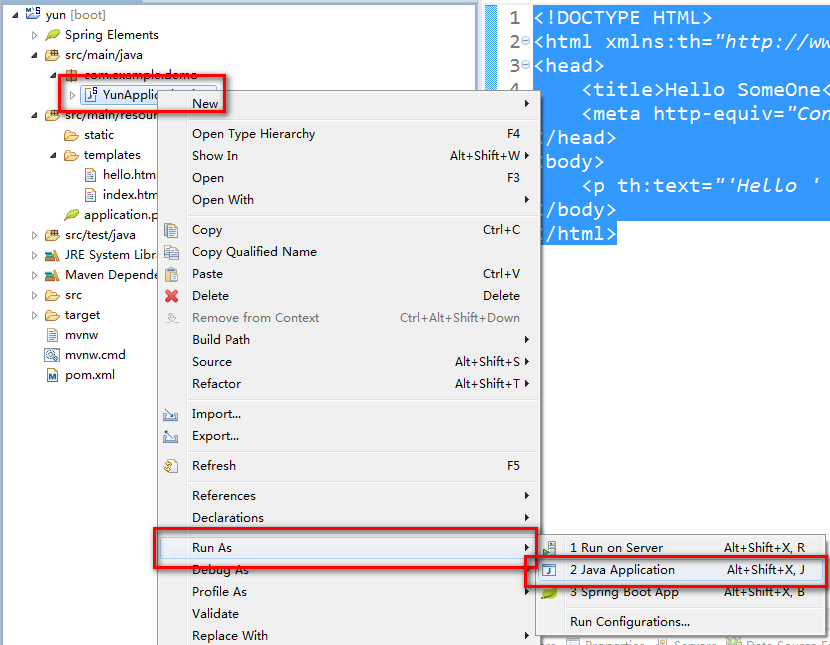
右键 Yunapplication.java ,点击Run as,然后选择 Java Application

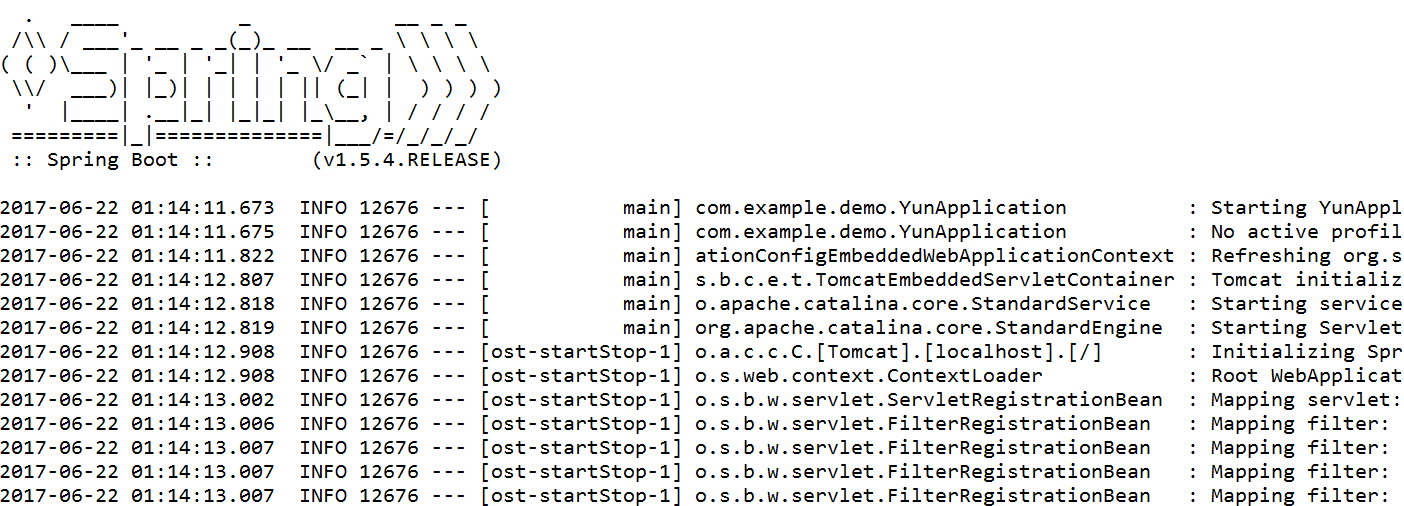
控制台输出如下所示:

5.2.进行测试

5.2.1.打开浏览器,输入:
1
localhost:8080

输出结果如下所示:

5.2.2.输入:
1
localhost:8080/index

5.2.3.输入:
1
localhost:8080/hello/1/jackie

5.2.4.输入:
1
http://localhost:8080/hello?id=1&name=jackie